Yuck.
It’s that time again.
Time to sort your products.
Get comfortable. You’re in for a (sing along with me) “three-hour tour.”
Unless…
You’re using Magento’s Virtual Merchandiser that can sort your products in minutes, not hours, with an easy-to-use, drag-and-drop functionality that has flipped traditional merchandising on its head.
Sort Products in Minutes with Drag and Drop Functionality
Gone are the days of manually entering sort orders. Long gone.
With Virtual Merchandiser, you can reorganize how your products are displayed on any category or product page visually.
Here’s how it works:
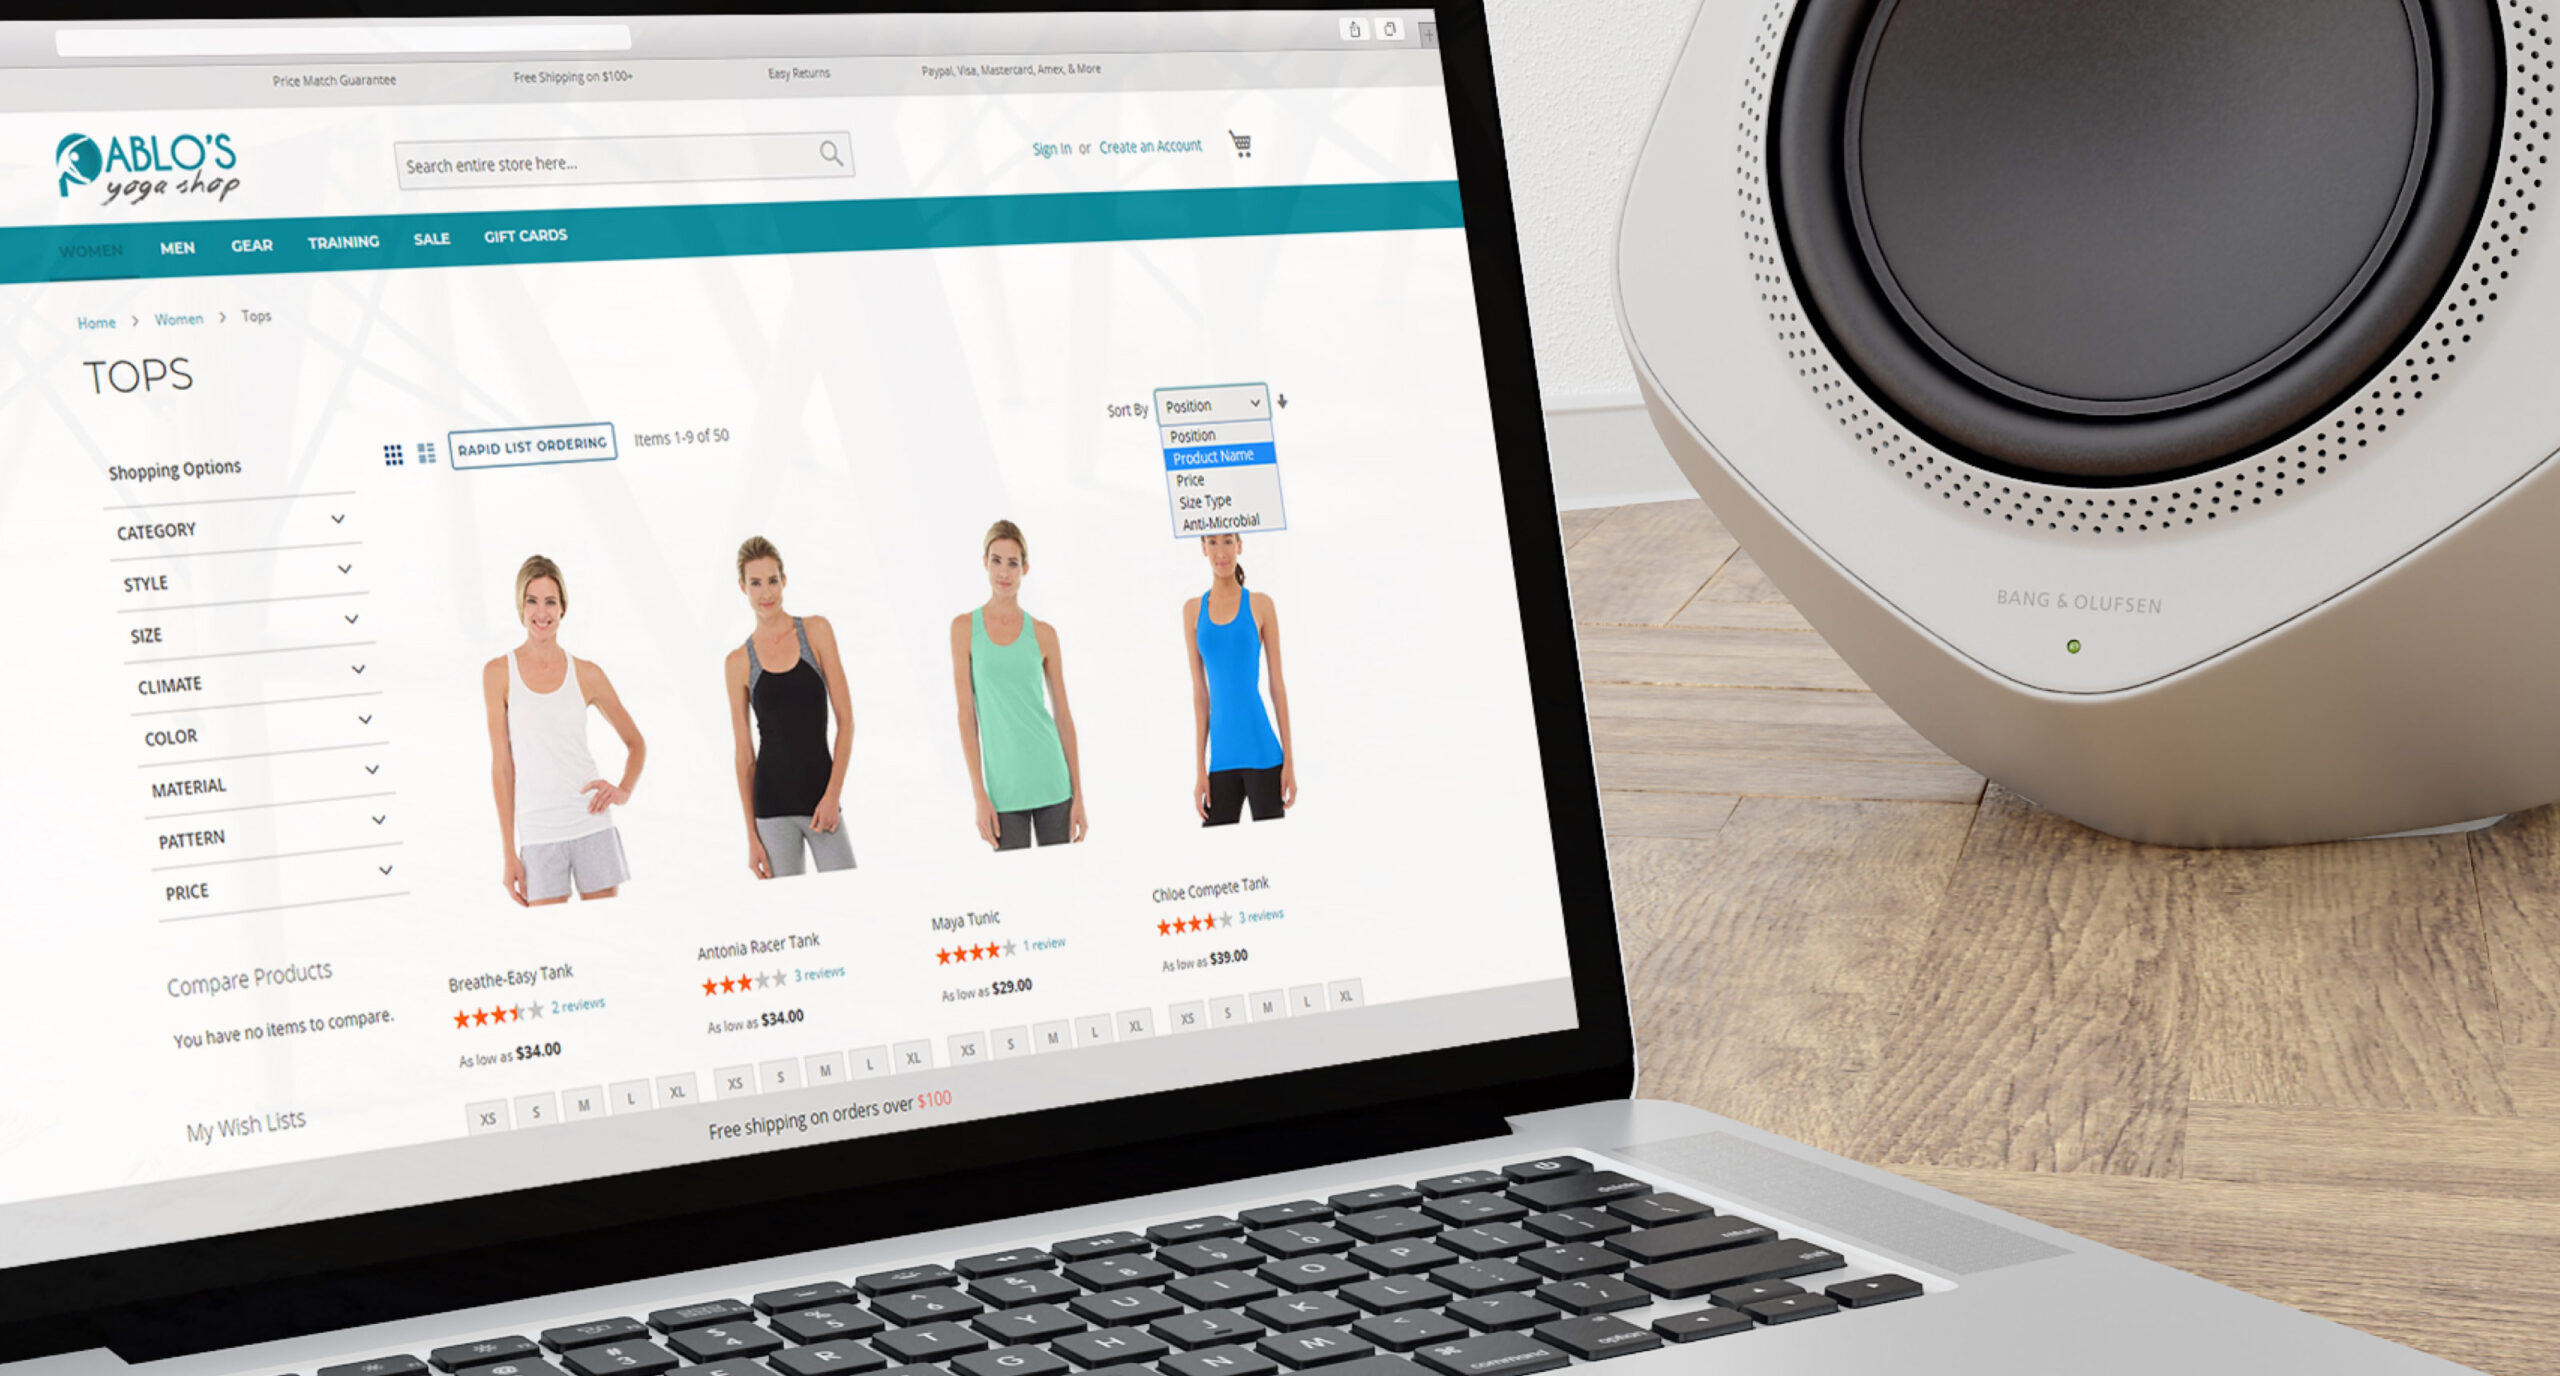
Products are displayed in Visual Merchandiser exactly how your customers see them on the front end. What you see, is what they see.
Simply drag and drop the products visually within a category grid.
No more manually entering sort orders for every single product, then viewing the results on the front end only to realize that you made an error somewhere and now you have go back and somehow figure out how to put a product between 12 and 13. Ugh.
Nope. No more.
With Visual Merchandiser, it’s a new merchandising world.
A world where product sorting takes minutes, not hours.
A world free of time-consuming, mind-numbing sorting.
A brave, new world.
If you’re already using virtual merchandising, bravo! If you’re not, shame on you. You’re sitting on a time-saving goldmine.
Assign Products to Categories with One Click
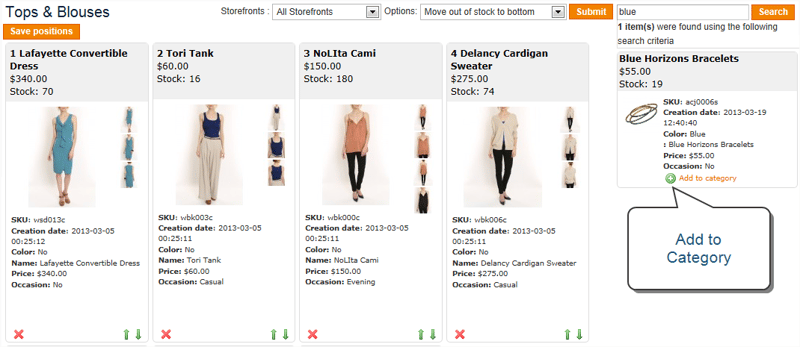
Virtual Merchandiser also allows you to assign multiple products to categories with just one click.
Search for a product by any attribute (SKU, brand, even color) from the built-in search function. From the search results, just click Add to Category on all the products you wish to add. Then drag and drop the products to your desired location.
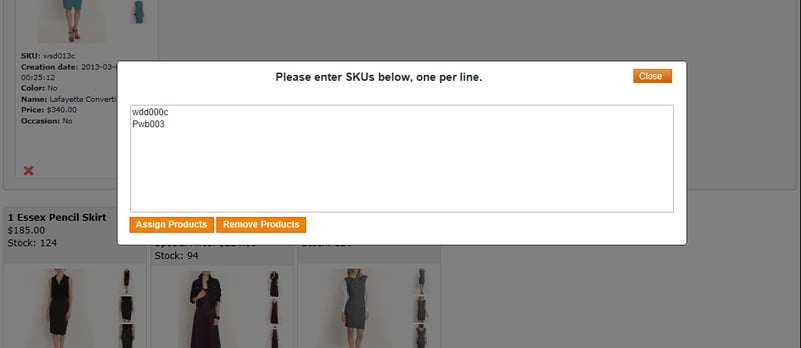
Add Hundreds of Products to a Category by SKUs
Adding many products to a category used to a laborious process.
Export. Edit the csv file. Import. Check the front end. With the Mass Product Assignment feature within virtual merchandiser, the process is quick and easy.
Choose Mass Product Assignment from the drop-down menu. In the pop-up window, simply paste your SKUs. Then click Assign Products.
That’s it.
Really.
No exporting. No importing.
The products are assigned your chosen category instantly. You can even remove products exactly the same way.
Native to Magento 2 Enterprise Edition
Starting with Magento Enterprise, version 1.14.1, Visual Merchandiser comes as native functionality. If you are a previous version of Enterprise, Open Source, or Magento 1 Community Edition, you can still purchase the Virtual Merchandiser extension from ontap.
Visual Merchandiser Features:
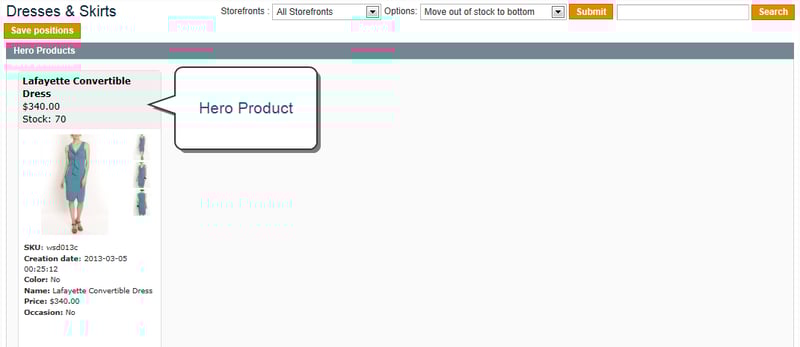
Hero Products
Feature select SKUs as hero products that appear first in the list.
Smart Categories
Create dynamic product lists with logic based on current attribute values.

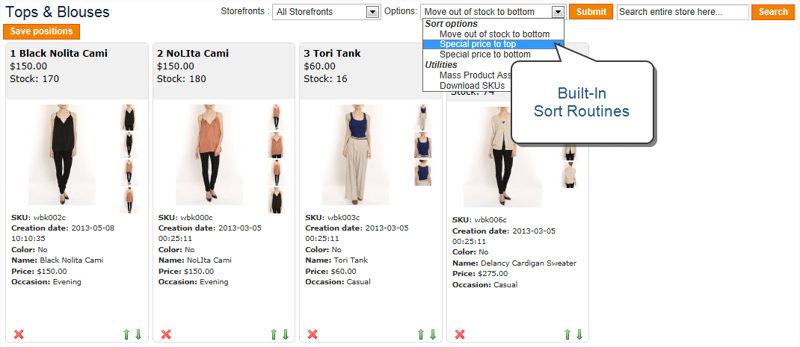
Automatic Sort
Sort the list using a selection of built-in routines. The product listing can be automatically resorted whenever the product selection changes.
Product Search
Find products based on name or SKU, and add them to the category.
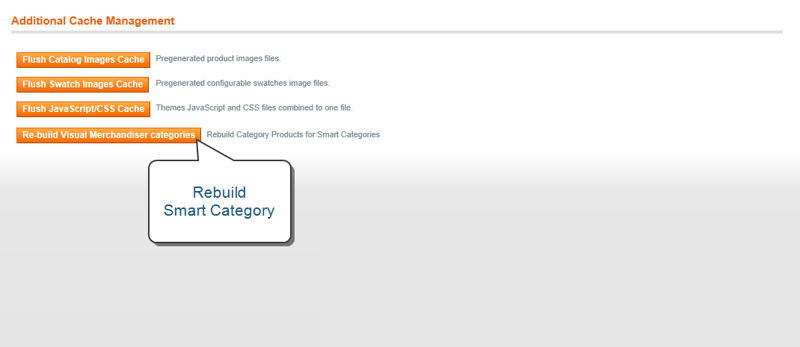
Visual Merchandiser Cache
Smart categories update on schedule. You can also initiate a rebuild anytime from Cache Management or the configuration.
How to access Visual Merchandiser:
- On the Admin sidebar, tap Catalog. Then choose Categories.
- Drill down through the category tree, and click the category that you want to edit.
- Scroll down, and expand (
 ) the Products in the Category section.
 - Tap the View as Tiles (
 ) button to display the products as a grid.
 - When complete, click Save Category.
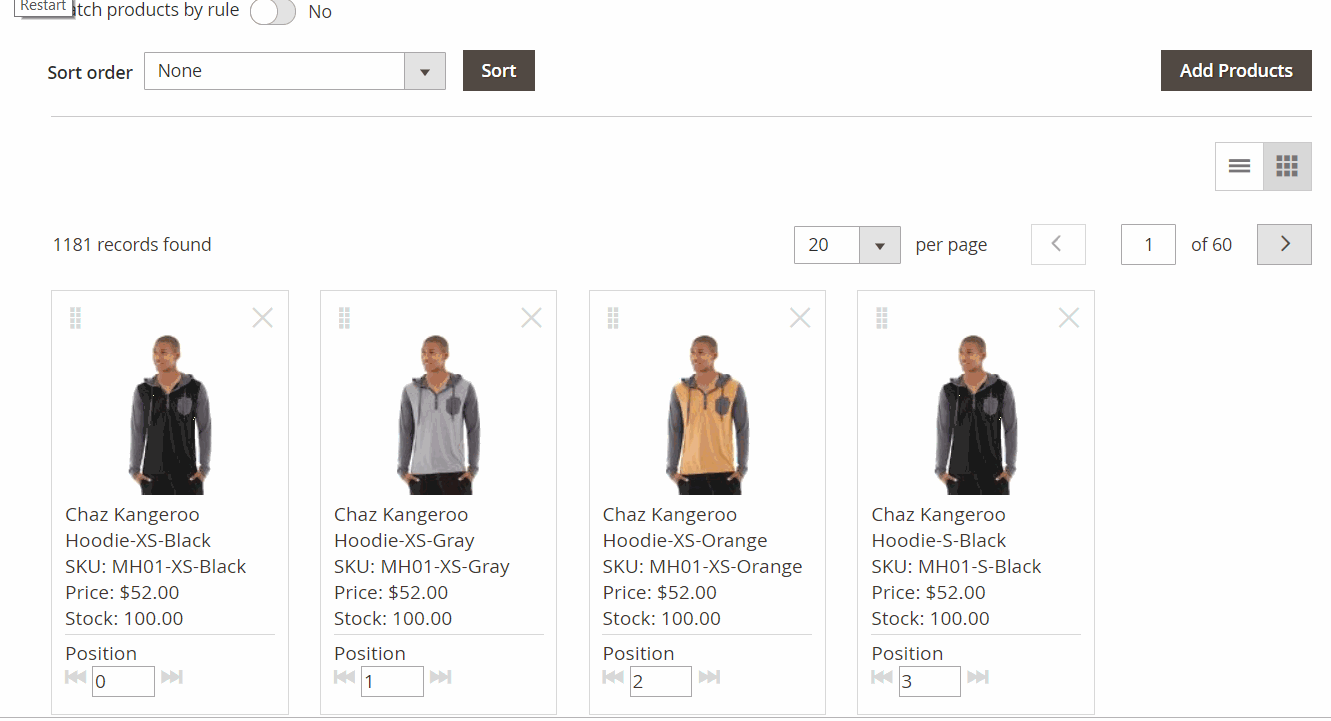
How to change the position of a product
Method 1: Drag and Drop
Grab the Drag (![]() ) control in the upper-right corner of the product tile, and drop the product into position. The number of each product adjusts to reflect the new position.
) control in the upper-right corner of the product tile, and drop the product into position. The number of each product adjusts to reflect the new position.
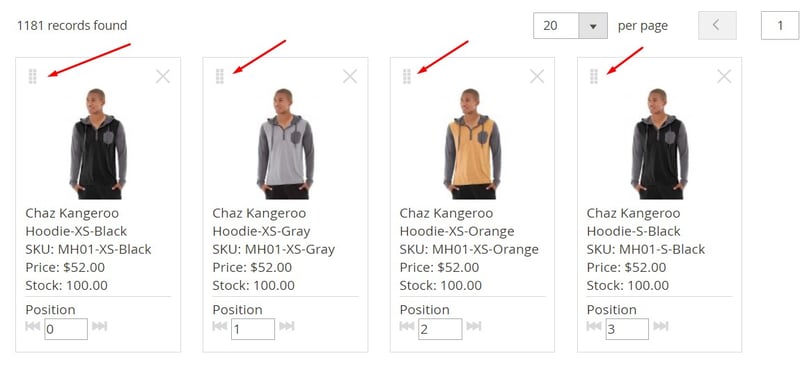
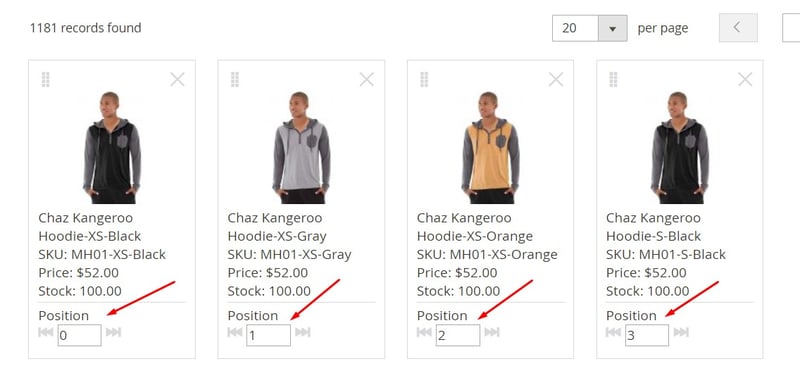
Method 2: Set Position Value
In the Position field ( ) on the product tile, enter the number where you want the product to appear. Enter the number zero (0) to place the product at the top of the list.
Boost your sales and save time with Virtual Merchandiser
Once you use Virtual Merchandiser, you’ll wonder how you ever functioned without it. It’s a life-changing, time-saving simple feature that comes standard on Magento 2 Enterprise edition.
With all the time you’ll save, you’ll have plenty of time to watch Gilligan’s Island reruns.
If you any questions on how to use Virtual Merchandiser or need info on Magento 2, please contact us. We’d love to help.
Leave a Reply
You must be logged in to post a comment.