So you’ve built up your Magento eCommerce page. Let’s say you’re selling amazing organic, top quality tea on your online store. You’ve got your pages looking sleek and the start to finish checkout process is a breeze. Your customers love your products and the ease with which they can shop.
Now you’re maybe thinking about adding a bit more meat to your eCommerce Store to keep your customers engaged and bring new tea connoisseurs to your digital storefront. You might want to add some media pages with videos, tap into your vibrant social media feeds, or even start a blog to bump you up in those search rankings. Everything outside of your Catalog, Products Page and Checkout flow would fall under the purview of a Content Management System (CMS).
You know Magento commerce is a great foundation for your eCommerce platform functions, but you might have some doubts about its CMS capabilities. We don’t want you to worry about having to integrate with WordPress or Joomla to do all this. Magento is definitely able to meet all of your CMS needs.
In this guide, we’ll put your mind at ease and go into detail about how you can use Magento’s page builder as a CMS.
Drag and Drop
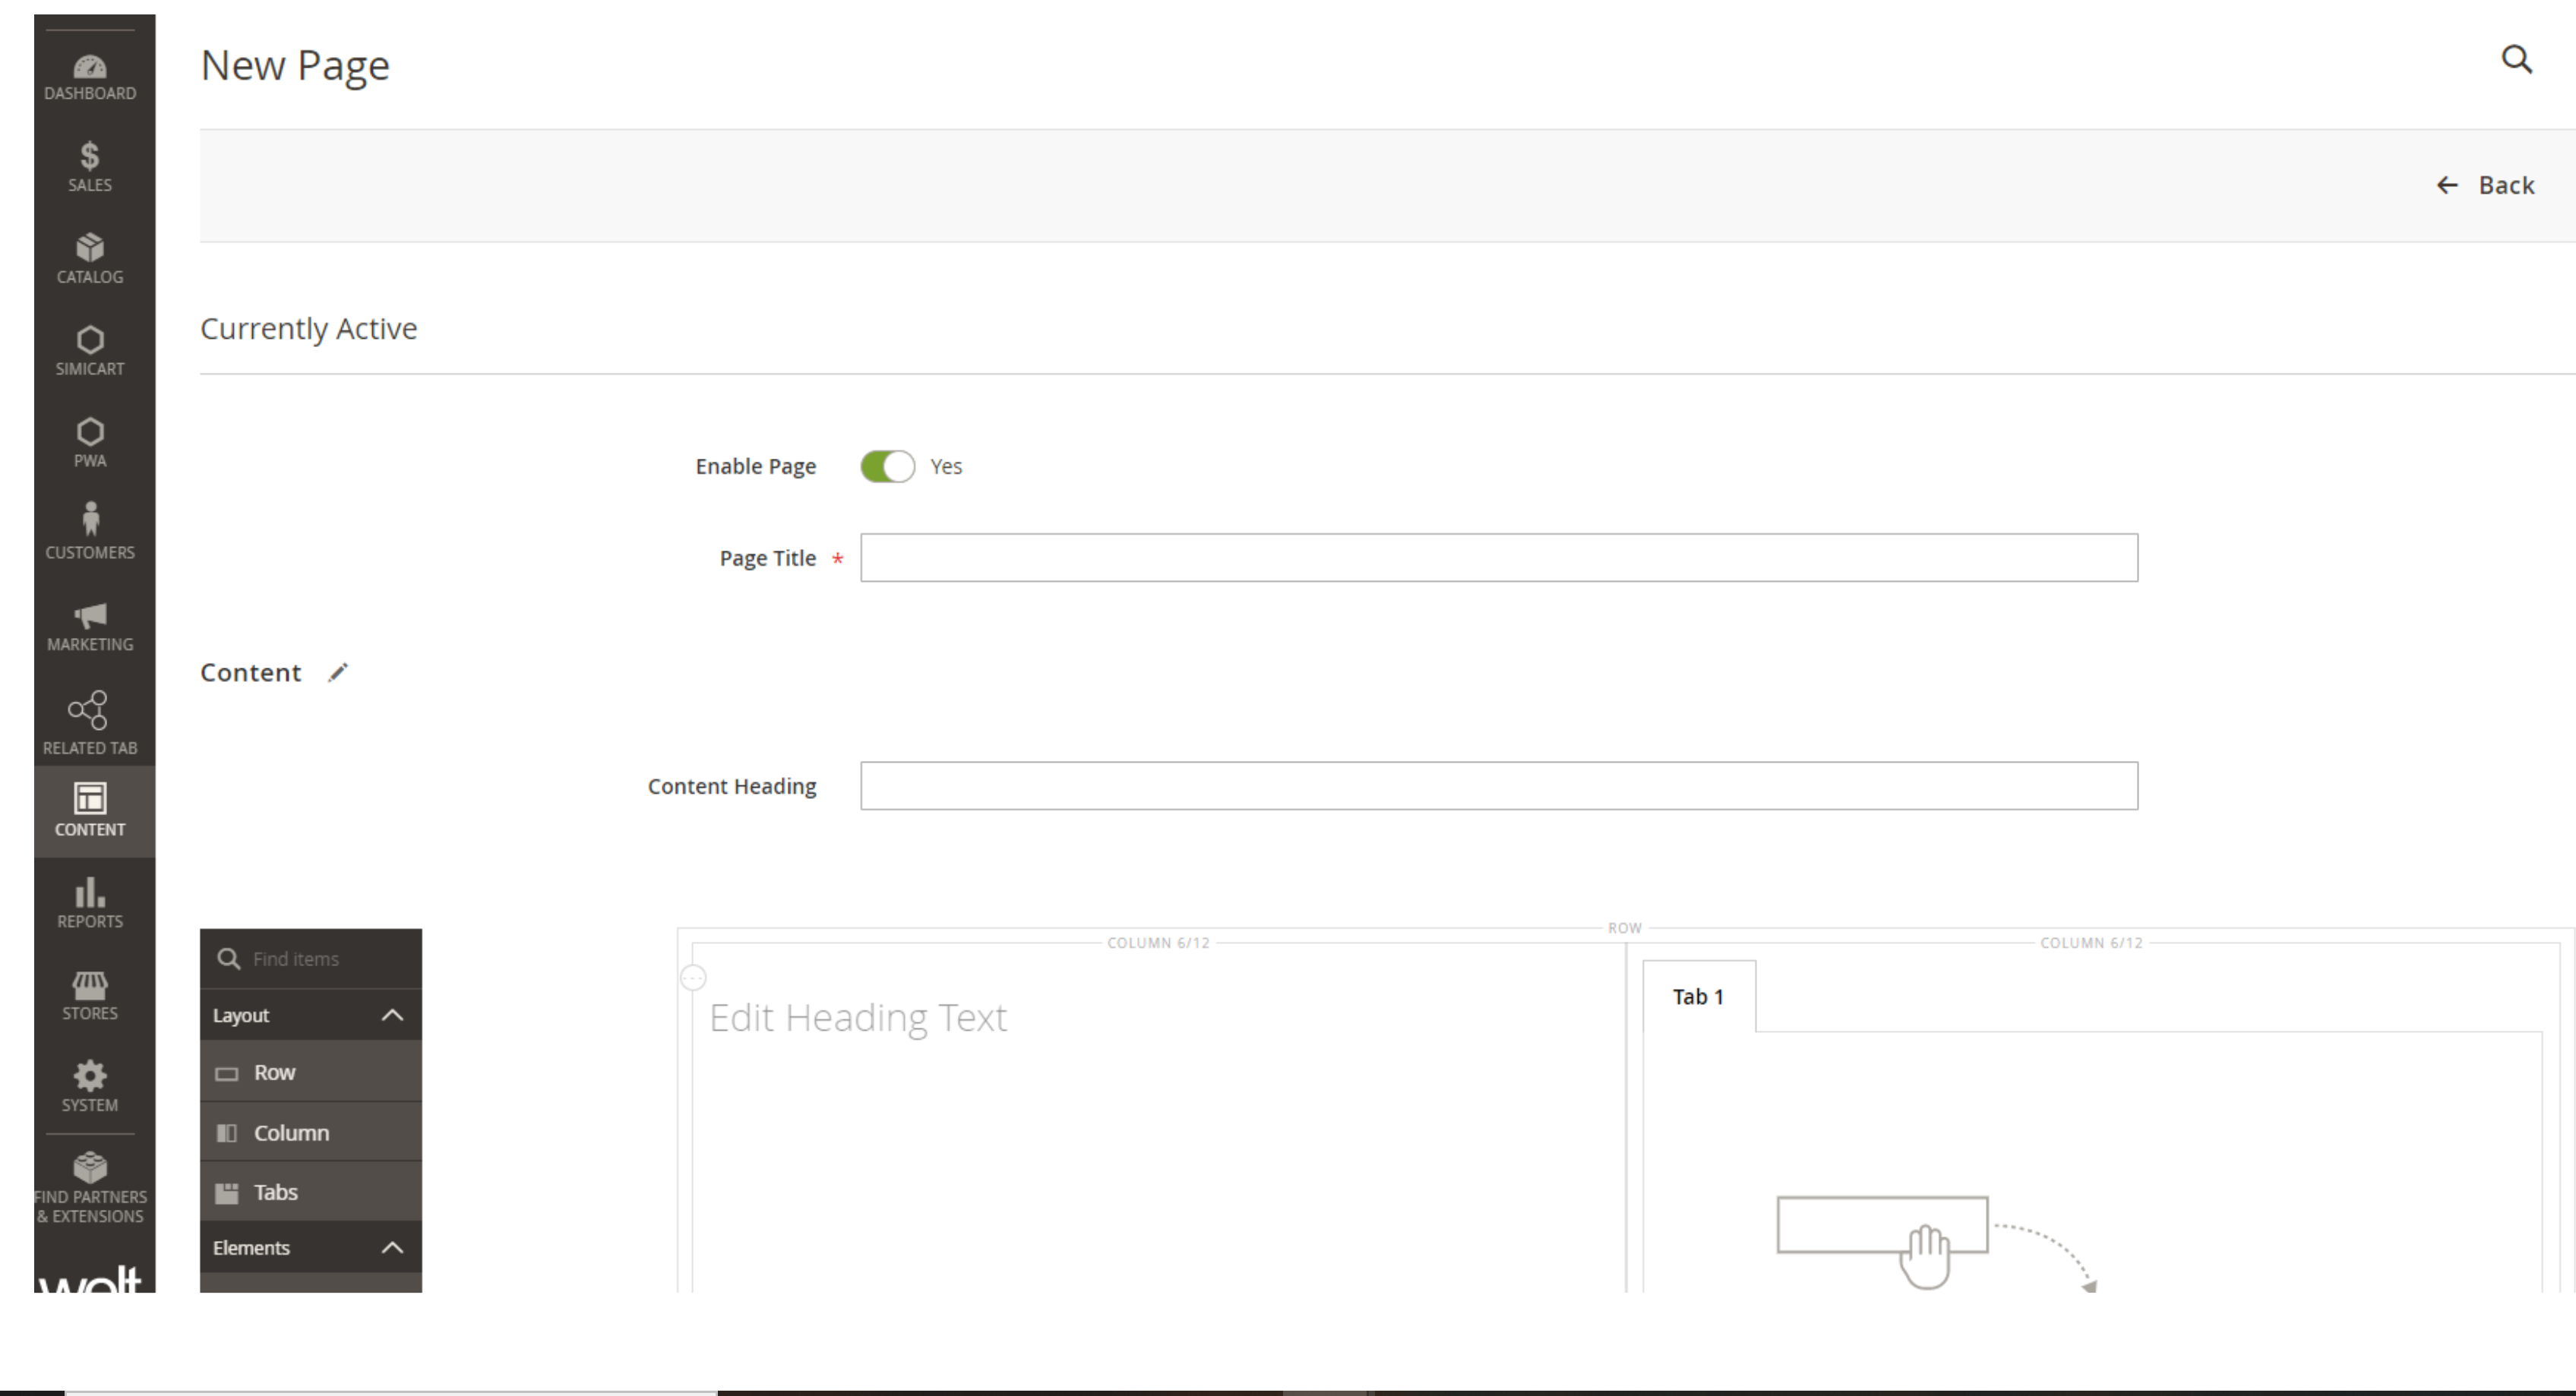
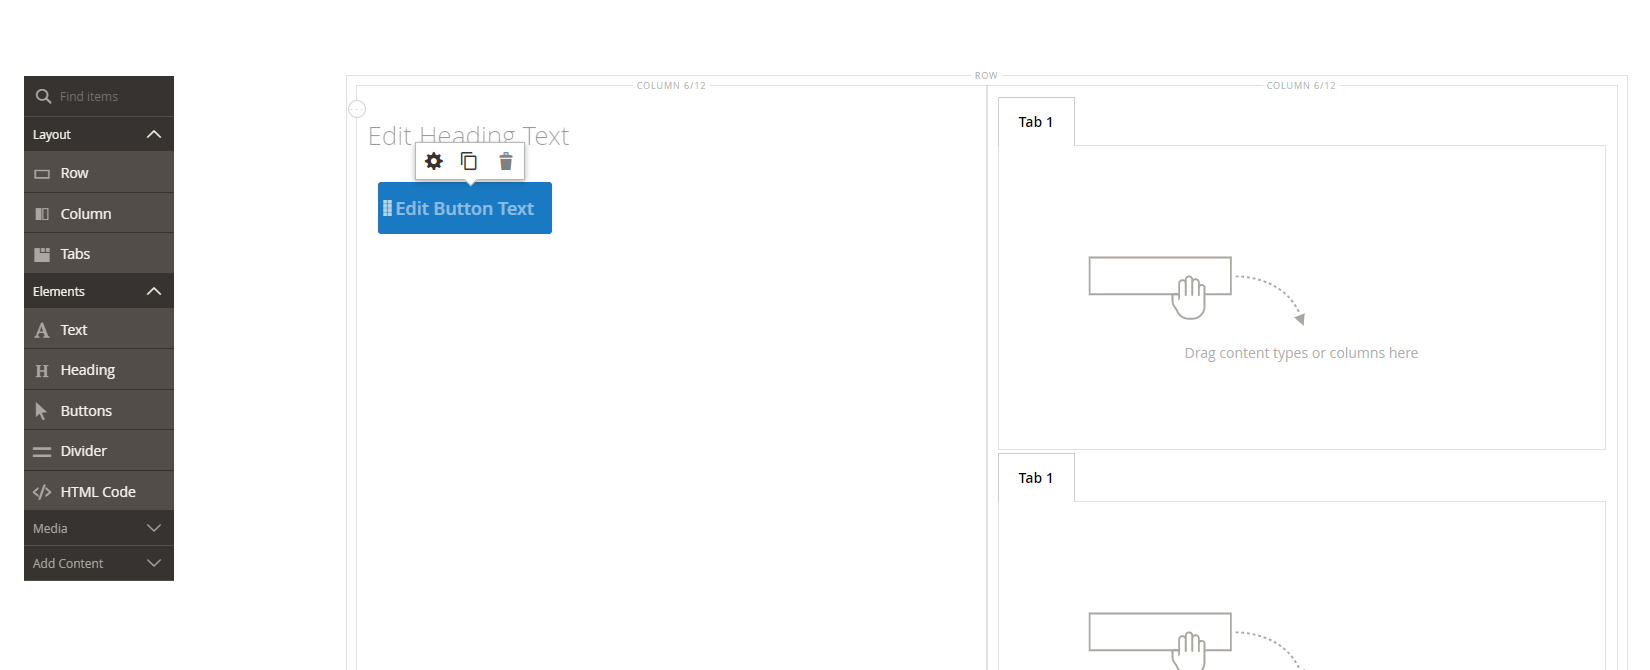
The ”drag and drop” editor. That’s the type of interface you’re going to get with Magento. It allows you to create pages with pre-designed templates and drag them in. Simply put, the interface lets you input and edit the fields you want to show on your front end and see how they will look before actually publishing them. You don’t need to know fancy code as it’s user friendly and very beneficial from a visual perspective.
If you’ve worked with other CMS platforms like WordPress or SquareSpace, it’s going to be a similar deal. You drag and drop the blocks that hold your content:
- Headings, subheadings and paragraphs of information
- Images and videos
- Widgets and external feeds
Now we’ll get into the steps and details about the capabilities of Magento CMS.
Creating a New CMS Page
Let say you’re looking to add a more educational aspect to your site with some videos from tea experts. You’ve got a few on your YouTube channel and have been posting on social media, but now you want to bring them to a new page on your site.
In the CMS Menu, navigate to the Add New Page button to get started. You’ll have the following sections that you can edit to make your page look the way you want and do what you need it to do:
- Page Information: this is the general information about your page like title, URL, store view, and enabling the page

- Page Title: This is where you enter what the page will be called. It will be displayed at the top of the browser and will come up in organic search, so it’s important for SEO to include a keyword here. We’ll call ours “Making Tea with the Experts.”
- URL Key: How to reach your website. This is what clients will use to access this particular page.
- Store View: Here you can select the language you would like the site to be displayed in.
- Status: In order to keep your page active, Enabled needs to be selected here.
- Content: This is where all the magic happens. Your HTML codes go here that make your site look and function the way you like.

- Content Heading: Here you input your page heading. In our case the same as the title, “Making Tea with the Experts.”
- Editor: This is the section where you create your content. This is where the formatting will be done, where your widgets will go, and where you’ll store all your media like videos and images.
- We’ll add in the videos here, short captions explaining the types of tea, the methods, and who the tea master in the video is, to give them some credibility. These descriptions will also help us out in SEO. If we have a video about Oolong tea preparation, then these keywords on the page will help our page rank higher for keywords related to Oolong.
- Design: This is where you can customize the layout of the page. You can select from the available templates or create your own.

- Page Layout
- Layout: Here you can split your page into columns. We want to have two columns; one with the title and description to the side and one to hold the video embeds.
- Layout Update XML: Here is where you update the layout with XML code.
- Custom Design
- Custom Design From/To: Set a date range for when you want your design to show. If you don’t specify a date range, then it will always appear.
- Custom Theme: This allows you to select a customized theme and apply it to your site.
- Customer Layout: This is a similar feature to Page Layout, but will override it if selected. So you can use this if you want to temporarily reformat a page for a special event, season, or promotion.
- Meta Data: Here is where the cool SEO bits are added to help you rank up in the organic search results.

- Keywords: Enter the keywords that your page is about and that you’re trying to rank for. For this page, we’ll list out all the kinds of tea that are mentioned in the videos.
- Description: This is the blurb about your page that will be shown on the search results page. Summarize your page and include the main keywords.
These are all the sections of the CMS interface that you have in Magento. Once you’ve entered the information make sure you hit Save Page.
CMS Blocks
Beyond the pages, Magento has something called CMS blocks. Now these need to be inserted within a page, catalog or other system page. They can’t exist independently on your site. You can also place them inside a CMS Widget (we’ll get into this next).
So what is a CMS block? It’s a lot like the WYSIWYG inputs you get when building content on pages, but with one main difference: you can add blocks in multiple places across your site. For example, you could have a block highlighting that you provide free shipping on all orders over a certain amount. You can lock this block in place on the bottom right of every page on your site and not have to add it separately to each one.
CMS Widgets
This is where you can make your site extra cool. Widgets are going to be all your bells and whistles like maps, top products, or social media feeds. These can be placed on Pages, in Blocks, or even have Blocks placed inside of them!
Customized Modules
Since Magento is a fully customizable platform, anything you may need that hasn’t already been listed can be added in manually. You have complete control over your site and the codebase is fully editable. You remain in control of all the content, function, and layout of your site at all times.
This does require coding knowledge, but it leaves you in the drivers’ seat in terms of who you want doing the work. You can bring on an expert team to set it up, like 121eCommerce, or you can have your in-house developer work on small add-on projects to your site in their free time.
Magento Extensions
If none of the solutions above work for what you need done on your site, Magento offers thousands of extensions in the Magento Marketplace with a wide range of functions. They go beyond the eCommerce websites functions that are the platform’s main focus and include things like webforms or blogs.
You may seriously consider the blog extension, since there is, unfortunately, no built-in blog functionality on Magento. Blogs are quickly becoming a standard across many industries and a key factoring in improving your SEO strategy. For our tea example, we would definitely write a weekly entry about something related to the industry: tea traditions, highlighting a tea farmer, or focusing on the health benefits or certain herbs.
Summary
While Magento is primarily built to be the backbone of your eCommerce it is more than capable of also serving as your main CMS. You have the same type of functionality as your traditional drag and drop page builders, you have the WYSIWYG interface, and you have content blocks that can be applied across you site to reduce the need for replication of the same info.
Although you and your team will have to spend a bit of time getting used to the particularities of Magento as a CMS, the same would apply to any other platform. Once you get going, you’ll be happy you didn’t waste extra time and money trying to integrate your existing Magento platform with another CMS platform.


Leave a Reply
You must be logged in to post a comment.